
The true test in Shadow Labyrinth often emerges when traversing the Great Tree, also known as the Sky-High Tree. This section represents one of the game`s initial challenges requiring substantial exploration and precise movement. For players familiar with Metroidvania titles, the experience might feel familiar: numerous branching pathways leading to optional rooms and hidden areas. While these diversions are useful for resource gathering, it`s easy to become disoriented. Furthermore, the game’s map can be somewhat ambiguous, potentially causing players to miss crucial doors and ledges that are vital for progressing through the main objective.
If you find yourself struggling to navigate the intricate areas of the Sky-High Tree, rest assured. Below, you will find a comprehensive, step-by-step guide detailing how to successfully traverse the Great Tree in Shadow Labyrinth. This journey culminates in a significant boss encounter, rewarding you with a key ability essential for advancing further in the game.
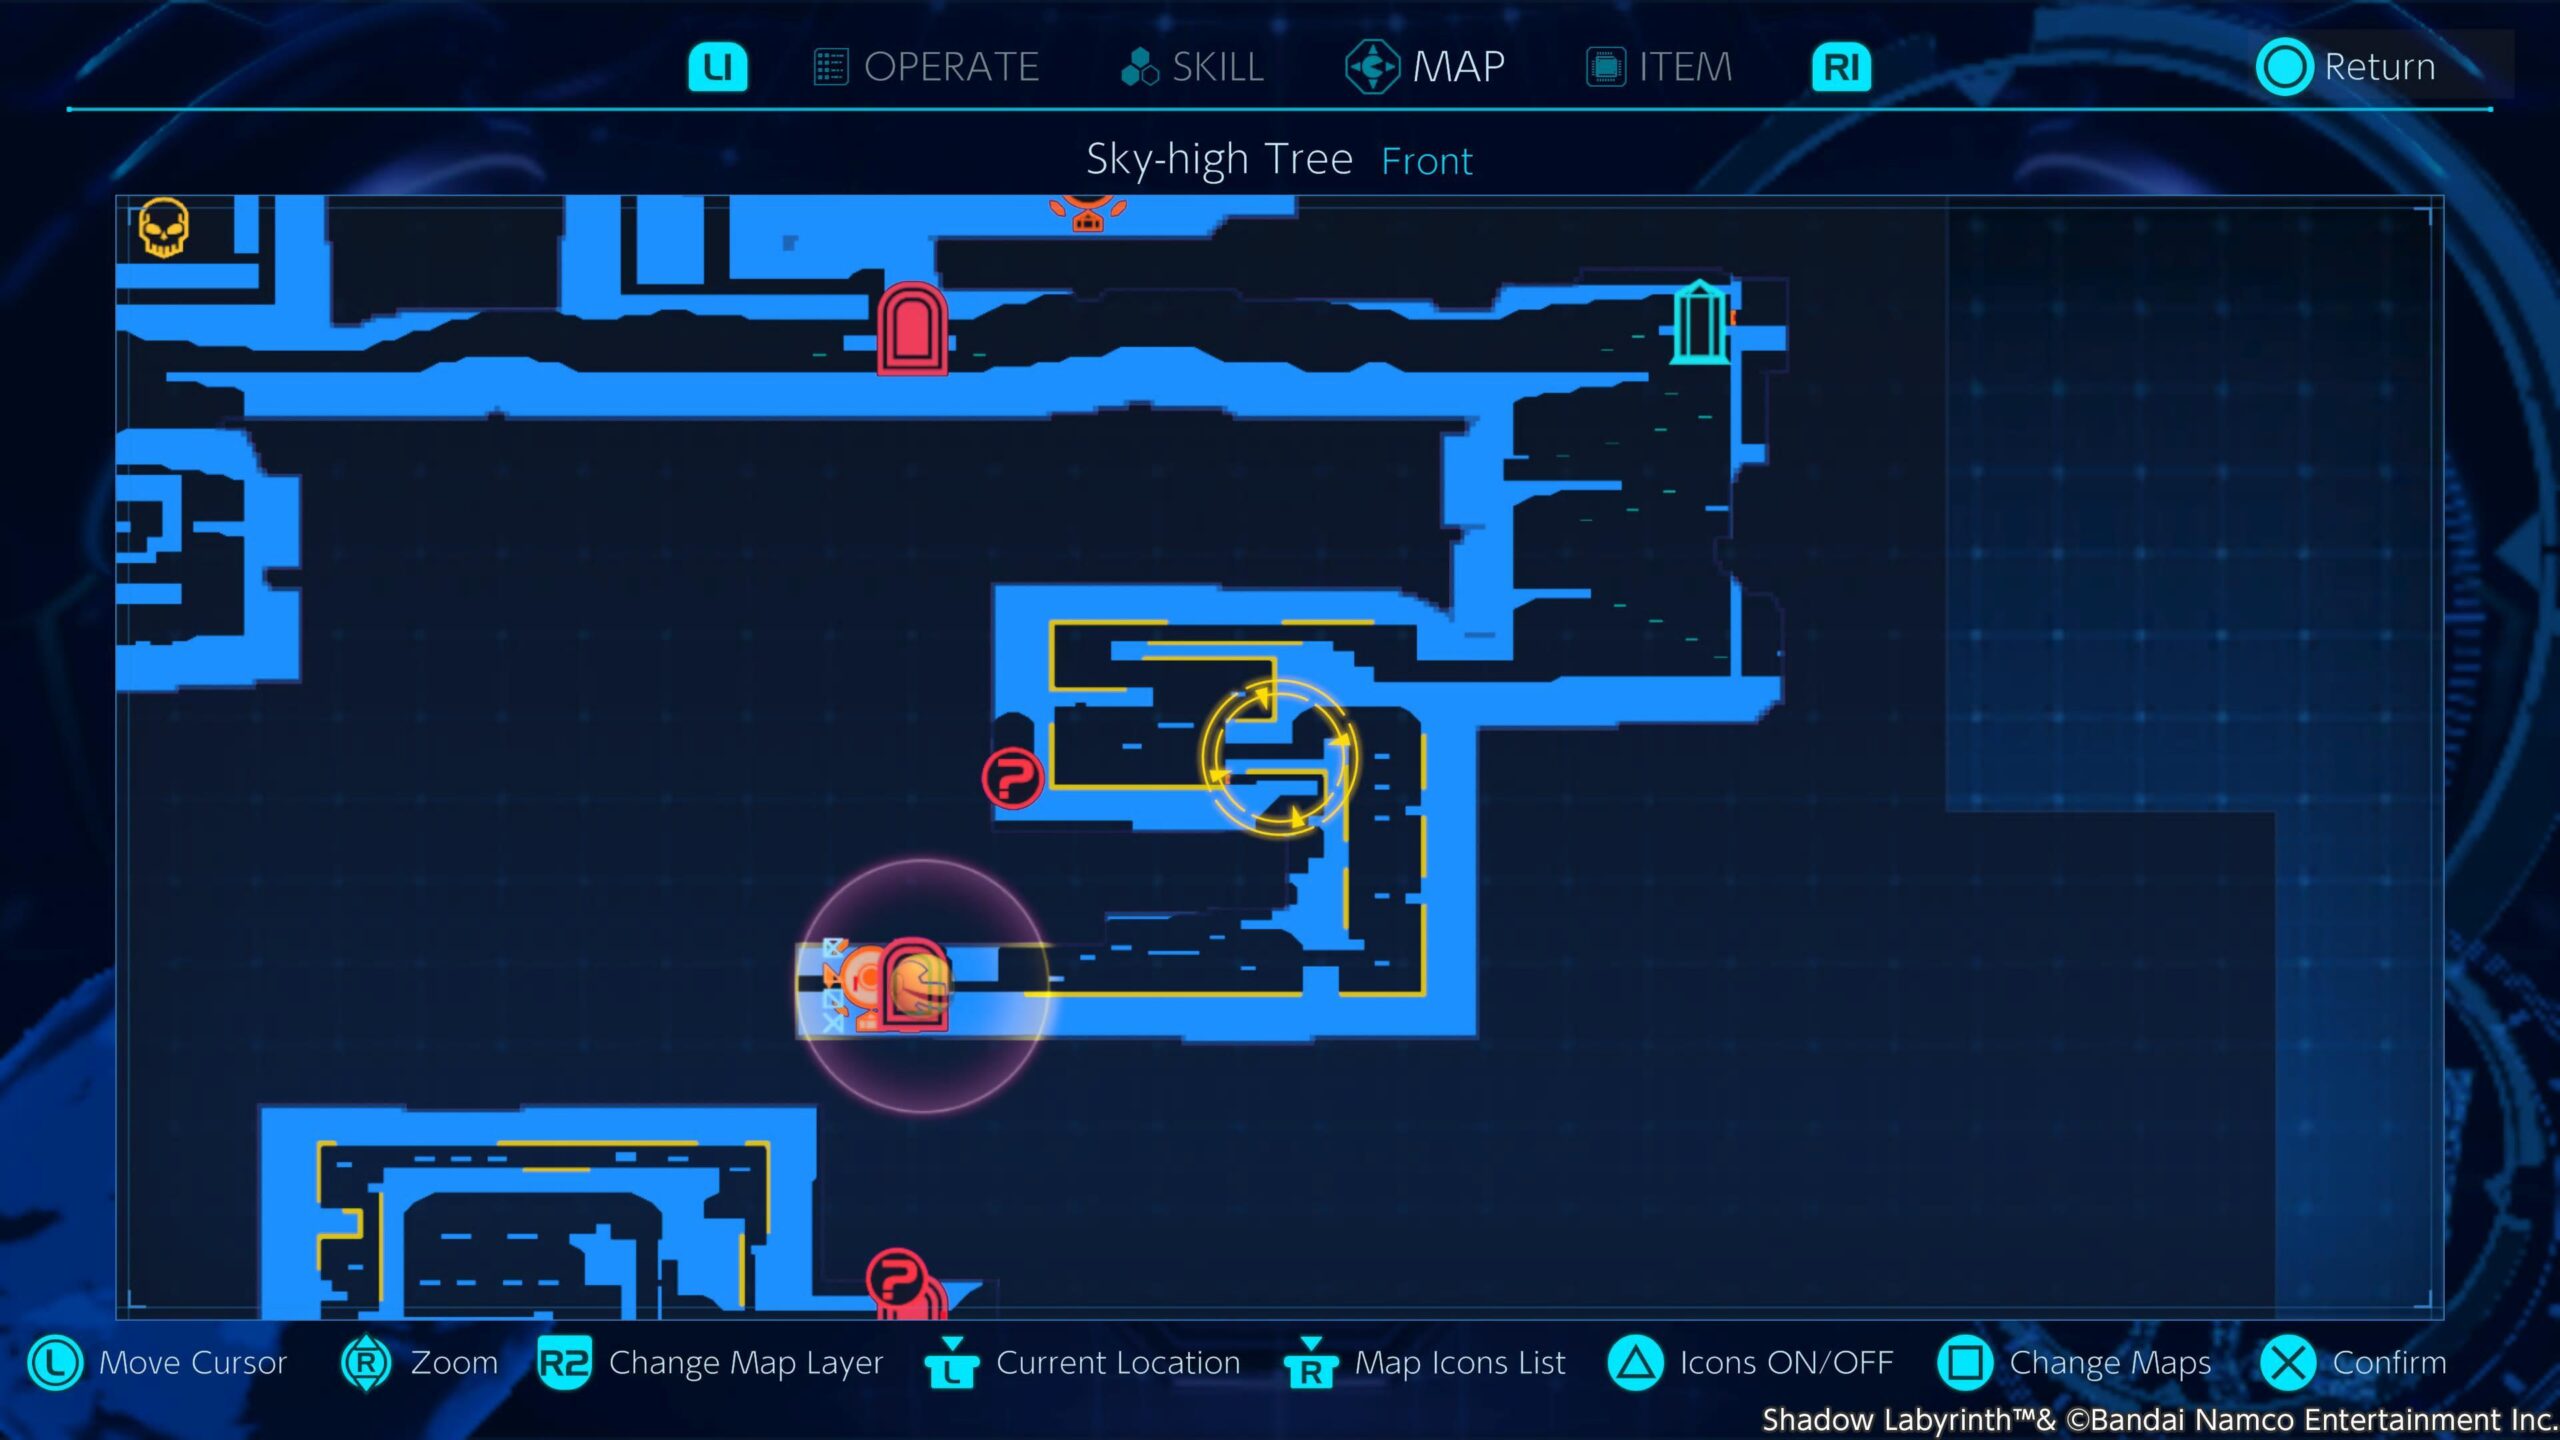
How to Navigate the Great Tree in Shadow Labyrinth
Access to the Great Tree area becomes available after successfully defeating Orange G-HOST: Garbage Talos and obtaining the GAIA form through the G-Phase Shift. Despite the peculiar names, the initial segments of this zone are relatively linear. The main focus here should be on learning enemy attack patterns, as you will encounter several new types of adversaries as you proceed eastward.
A brief note: the included screenshots of map segments illustrate the area after most of it has been explored. Therefore, do not be concerned if your in-game map appears different. As previously mentioned, there are many optional areas that you can safely bypass for now if you wish to focus on the main path.

The eastern route eventually leads to a lift that descends underground. It is highly recommended to activate the Miku Sol checkpoint here, which will prove invaluable for any necessary backtracking. Once you reach the lower level, you will encounter an unusual NPC who grants a valuable new combat skill.
From this point, you will descend a vertical path offering two directions: west or east. If your goal is to stick to the main story progression, as covered in this guide, you should proceed eastward. This area is heavily populated with enemies and introduces new bouncing platforms. However, most of the foes encountered here are variations of those you`ve already faced in the starting region.
Upon reaching the western corner of the map, your next objective is to ascend. Using the Miku Sol checkpoint as a reference, follow the bouncing platforms, either engaging or evading the flying bugs and flowers along the way. Once you reach the summit, you will again be presented with two paths. Observing your map, the western path leads directly back to the starting lift. You can dismantle the barrier to create a convenient shortcut and reuse the checkpoint. Afterward, return from where you just came and take the other path.
The eastern path will guide you through narrow tunnels filled with spiky enemies. Advance slowly and deliberately, neutralizing them one by one, and continue making your way upward. You will then gain access to another D-Line, which transforms you into the familiar Pac-Man-like ball. The path from this point is largely linear. At the very end, ensure you take the path to the right, deliberately bypassing an optional area to the left.

From here, you will encounter a door prompting your entry. Proceed through it, and you will arrive in the back area of the Sky-High Tree. This section features a fairly straightforward progression, requiring you to use only two lifts to ascend to the top. One of these lifts is not yet accessible, and a path leading to the right side of the vertical area can be safely ignored for now.

At the very top, activate the Miku Sol checkpoint. You are now within the Verdant Shadow Path. Proceed directly eastward, following the D-Line, and prepare for some challenging acrobatic maneuvers as you ascend. The D-Line will largely dictate your forward movement, so stick with it until you emerge back into the open air. This is a larger area with a considerable number of enemies, so take cautious steps to avoid taking damage and falling. At the highest point, the primary path is to the left, but there is a crucial checkpoint to the right that you should absolutely activate.
Your next objective is to head left. The path is generally linear, although there is a brief, temporary optional route that leads upward; you can safely bypass this. Shortly thereafter, you will be back outside. Follow the winding paths until you begin encountering wooden structures, and carefully navigate your way through them. The key here is to utilize the large vines for traversal until you reach the eastern section. From that point, simply drop to the ground and continue moving to the left.

Utilize the vines once more to reach a long wooden structure with a gap in its center. Then, jump to the right side and engage any enemies you encounter. This path leads to another essential Miku Sol checkpoint. This specific segment is covered in greater detail in a separate guide, as it involves a boss fight that awards a second HP-Tank. In summary, continue heading east and prepare for a boss encounter.
Once that encounter is concluded, use the vine on the right side of the structure to ascend to the very top. Now, make your way to the far western corner of the area. Carefully plan your jumps to avoid any falls. You will eventually come across a gauntlet of enemies, which serves as an indicator that you are on the correct path. After dealing with the enemies, use the various structures to move upward, which will lead you into the upper area.

Thankfully, the path from here is quite straightforward. There is only one route to the right – if you happen to encounter a gargoyle, which primarily appears during the night, you can safely ignore it. Soon after, you will come across Night Gale, a massive creature that signifies an impending boss battle.

Before engaging the boss, activate the Miku Sol checkpoint. When you feel ready, confront Night Gale, who will reward you with the crucial ability to dodge while in mid-air. With this newfound skill, you can now proceed by following the path to the right of the checkpoint.

From this point, utilize your newly acquired mid-air dodge ability to navigate past spikes and grasp vines as you descend. You will then enter a similar area located beneath. Once you reach the very bottom, head all the way to the right, where you will be greeted by the Torn Lands. Congratulations on successfully traversing the challenging Sky-High Tree area!